Building your own Vulnerable AD LAB
Ever wondered what it would be like to build an Active Directory (AD) so frail it practically waves a white flag? Well, you’re in luck! In this post, we’ll guide you through constructing a small but delightfully vulnerable AD that might as well come with its own set of hacker welcome mats. So, grab your popcorn and get ready to dive into the world of easily exploitable networks, where the goal is not just to build, but to build badly! Today, we’ll ensure your AD is as robust as a sandcastle at high tide, vulnerable to the following attacks:
- Abusing ACLs/ACEs
- Kerberoasting
- AS-REP Roasting
- Abuse DnsAdmins
- Password in Object Description
- User Objects With Default password (Changeme123!)
- Password Spraying
- DCSync
- Silver Ticket
- Golden Ticket
- Pass-the-Hash
- Pass-the-Ticket
- SMB Signing Disabled
Setting up AD
Start by spinning up your Server VM with Microsoft Server 2019 or 2022. Once it’s up and running, follow these steps to get your AD environment prepped for its inevitable downfall.
1
Install-windowsfeature AD-domain-services
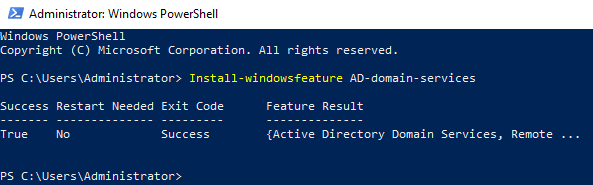
Once completed run the following powershell command to run the DC promo process.
1
Install-ADDSForest -CreateDnsDelegation:$false -DatabasePath "C:\\Windows\\NTDS" -DomainMode "7" -DomainName "domain.local" -DomainNetbiosName "domain" -ForestMode "7" -InstallDns:$true -LogPath "C:\\Windows\\NTDS" -NoRebootOnCompletion:$false -SysvolPath "C:\\Windows\\SYSVOL" -Force:$true
You will be prompted for a DSRM password (Directory Services Restore Mode) and then PS will do the rest :)
Reboot your server and log back in to make sure everything has been setup as expected.
Configuring the Vulnerable AD Service via PS Script
Run the below powershell commands as admin.
To understand what is being setup have a look at the vunlad.ps1 file. (https://github.com/safebuffer/vulnerable-AD/blob/master/vulnad.ps1)
1
2
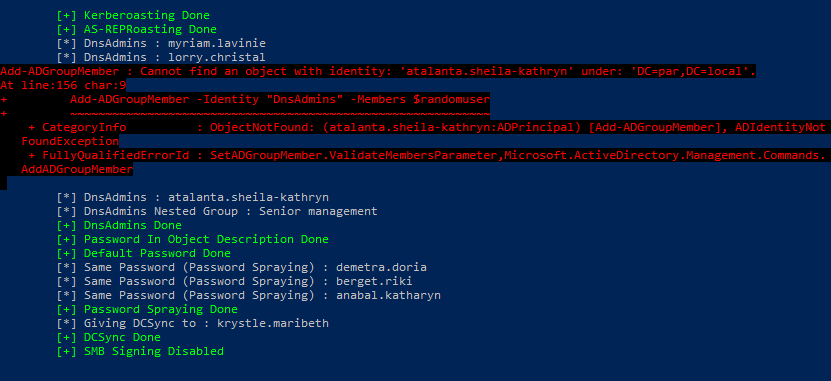
IEX((new-object net.webclient).downloadstring("https://raw.githubusercontent.com/wazehell/vulnerable-AD/master/vulnad.ps1"));
Invoke-VulnAD -UsersLimit 100 -DomainName "domain.local"
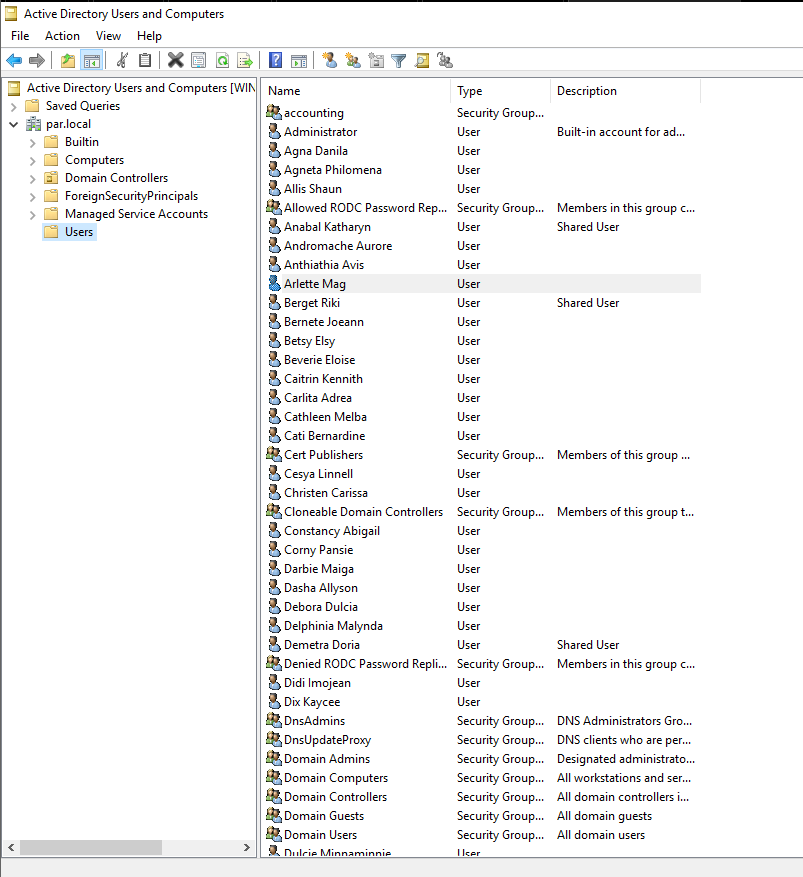
The script will add users, groups, SPNs etc to your domain.

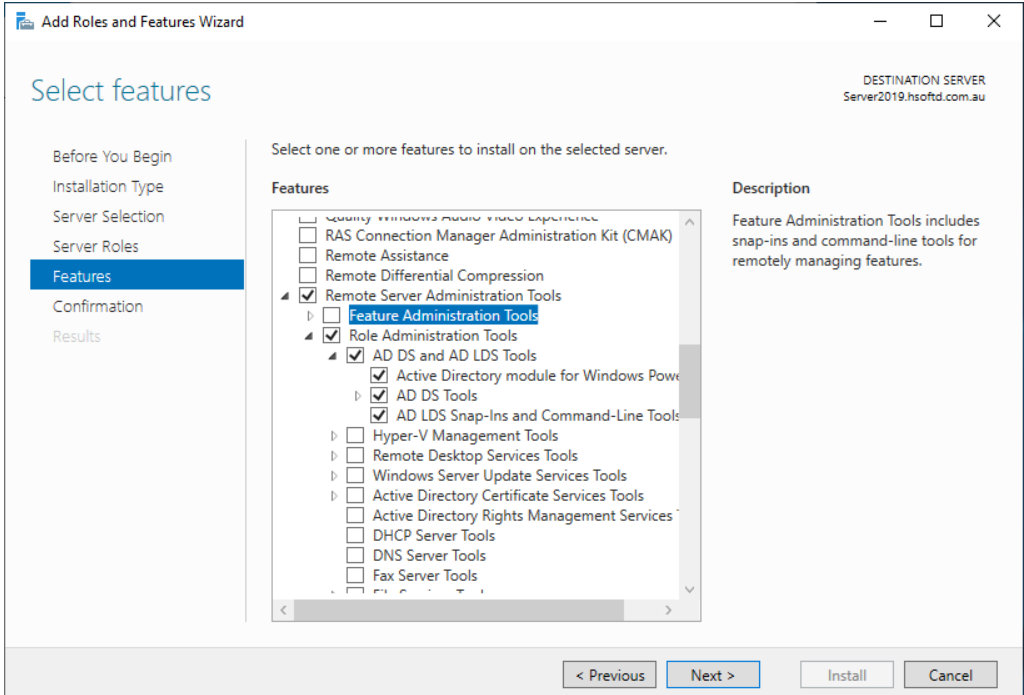
Install below features to see AD Tools
For easy of AD use you can install the below features on your server.
Additional manual configurations for funzies
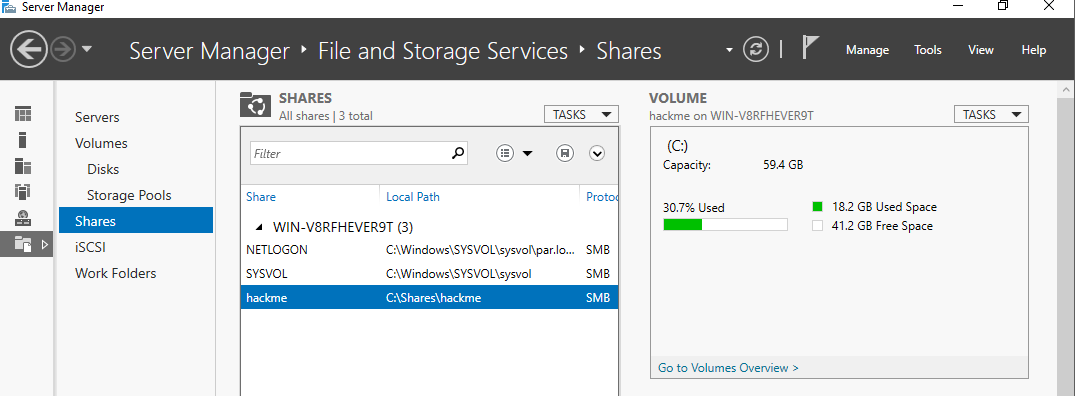
Configuring your File Server (Opening SMB)
Enable SMB file sharing and ensure ports 445 and 139 are open for future lab exercises.
- Launch Server Manager and navigate to “Dashboard” > “File and Storage Services” > “Shares”.
- Select “New Share” > “SMB Share — Quick” and proceed by clicking “Next”.
- Name the share “hackme” and follow the instructions to complete the share setup.
Creating a Service Principal Name (SPN)
Set up for a Kerberoasting attack.
- Open the Command Prompt as an administrator.
- Use the following command to set the SPN:
setspn -a myDomainController/SQLService.domain.local:60111 domain\SQLService. - Check if the SPN is set using the command:
setspn -T domain.local -Q */* | findstr SQL
Connect two Machines to your Domain
Follow these steps on the machines you want to join to the domain (MS01 and MS02):
- Set up network configurations. Open network & internet settings, adjust adapter options, and go to IPv4 > Preferred DNS Server. Input the Domain Controller’s IP address.
- Join the domain. Navigate to “Access work or school” > “Connect” > “Join this device to local Active Directory domain”. Enter the domain name as domain.local. Use the “support” account with the password “P@$$w0rd” to join. (Ensure this account is created on the Domain Controller with administrative rights.)
- Restart the machine.
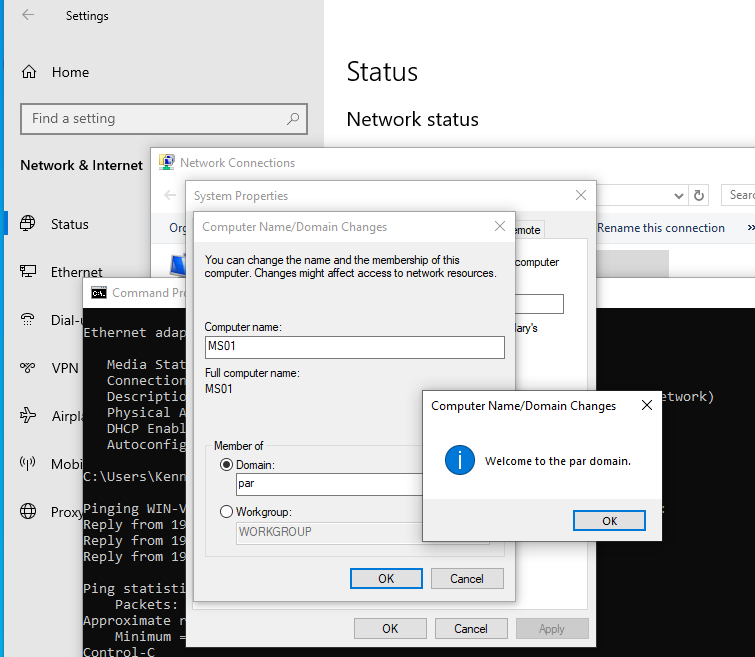
- After restarting, select “Other user” and log in as the domain user of your choice.
Assign local administrator rights: • Open “Computer Management” > “Local Users and Groups” > “Groups”.. • Double-click on “Administrators”. • Add the user (e.g., Kenny), verify the name, apply, and click OK.
Turn on Network Discovery: • Navigate to “Computer” and then “Network”. • Click OK when prompted and click “Turn on network discovery…” in the top menu bar.
- Verify that both computers have joined the domain: • On the Domain Controller, open “Active Directory Users and Computers” > domain.local > “Computers”. • Verify if both computers are added.
Create shares on your workstations. IYKYK :)
- On the first machine, give the first domain user (Kenny) local administrator rights. (MS01)
- On the second machine, give both domain users (Kenny, Rick) local administrator rights. (MS02)
- Create a network share folder.
- Create a folder named “YFO” and “Morty” in the C: drive.
- Right-click on the folder, go to “Properties” > “Sharing” > “Share” > “Share” > “Yes, turn on network discovery…”
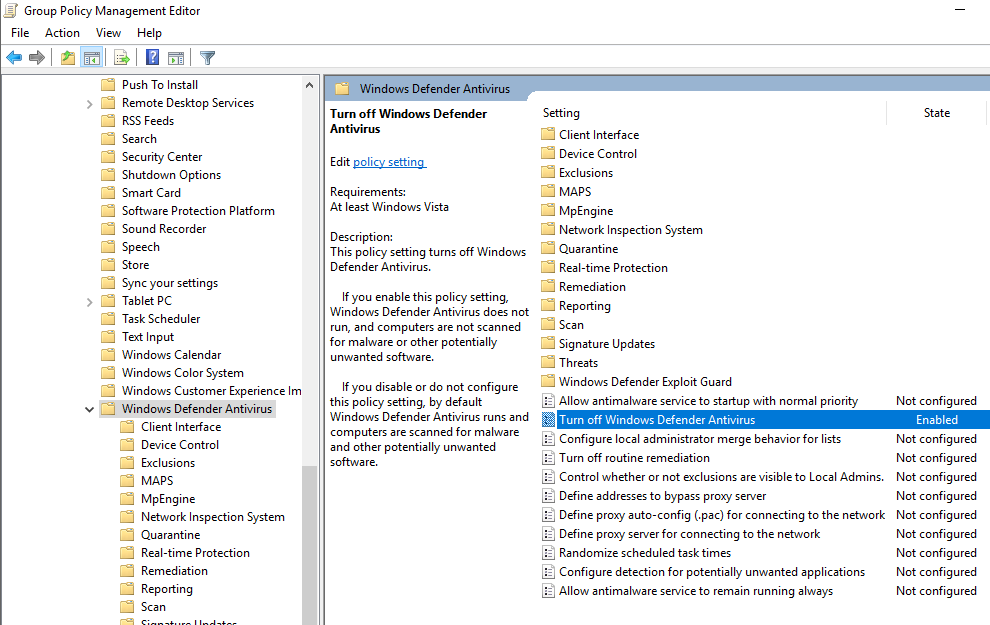
Set GPO to disable AV
Disable Windows Defender because ain’t nobody got time for that.
- Open Group Policy Management as an administrator.
- Expand the Forest > Domains > domain.local.
- Right-click and create a new Group Policy Object (GPO) named “Disable Windows Defender” in this domain.
- Edit the newly created GPO.
- Navigate to “Computer Configuration” > “Policies” > “Administrative Templates” > “Windows Components” > “Windows Defender Antivirus”.
- Double-click on “Turn off Windows Defender Antivirus” and enable the policy.
Closing Remarks
Congratulations, you’ve built the most inviting AD lab a hacker could dream of! Now, it’s time to unleash your inner cyber wizard. Go forth, test your skills, and hack away at your lab. Just remember, with great power comes great responsibility – and a lot of really funny error messages! Happy hacking!
References
- https://github.com/safebuffer/vulnerable-AD/
- https://sethsec.blogspot.com/2017/08/pentest-home-lab-0x3-kerberoasting.html